There are 3 ways you can authenticate with the REST API:
Basic Authentication
This is the default and most straightforward authentication method. Every HTTP request contains an authentication header according to the Basic-Authentication standard, in order to apply any relevant permission restrictions. HTTP requests that lack such a header are denied.
In this case, you need to consult with your System Administrator to obtain a valid user name and password. The user name is defined in the API User Name field of the Personnel File form and is separate from the user’s standard user name.
Note: You cannot use Basic Authentication (method 1) while External ID access is enabled.
Personal Access Token (PAT)
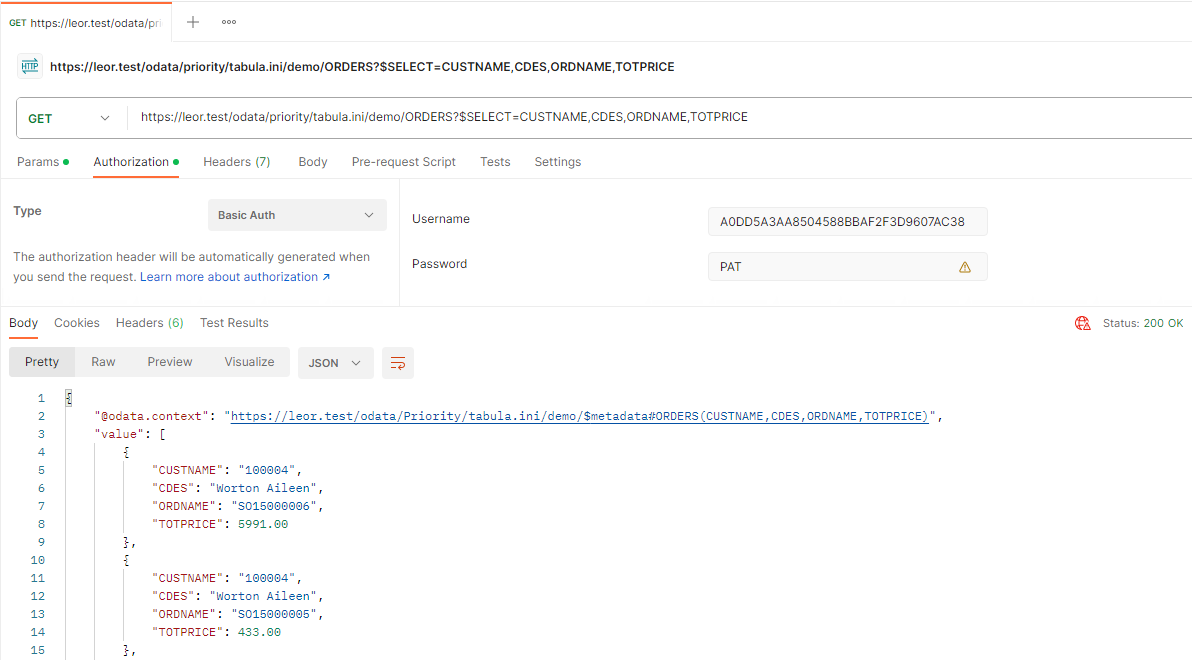
Introduced in version 19.1 of Priority. With this method, the admin can set a secret token to be used by the client in order to authenticate. Multiple PATs can be associated with a single Priority user, and they can be replaced or deleted independently of one another. PATs can be defined in the REST Interface Access Tokens form in Priority. When using this method, the Authorization header should be set to Basic, the username should be the PAT that was defined, and the password should be hardcoded to PAT.
OAuth2
This is generally used for 3rd-party access to the API. The API client needs to implement the OAuth2 flow, and provide an Authorization header of Bearer. Note that this option requires the purchase of the External ID module for Priority.
Guide: How to Authenticate with Priority REST API using OAuth2
The following guide is relevant only for on-prem (non-SaaS) installations. It was tested using Priority v 22.1.
When is OAuth2 Relevant?
Important Note
OAuth2 is intended for scenarios where end-users are interacting with your application using a browser or mobile app.
To authenticate automated server-to-server communications where no browser or mobile app is involved, use the Personal Access Token (PAT) method instead.
- You are the developer of a web/mobile application that uses Priority REST API
- Your Priority environment is configured to use External Identification
- You want the users of the application to access forms with their Priority user account instead of a generic “api_user” Priority account or Personal Access Token
- You want your users to authenticate in your application using the same IdP that they use to authenticate with the Priority UI
- You are familiar with implementing OAuth2 flows in your applications
Prerequisites
- The Priority Application server is configured and running.
- Priority OData is configured and running.
- Priority External ID module is configured, and all Priority users authenticate with the Priority UI using an external IdP
- You (the developer) have the necessary credentials to log in to the Priority UI.
This guide describes how to authenticate with the Postman tool (https://www.postman.com/) using OAuth2. This will serve both to test that authentication is working and as a reference for implementing the OAuth2 flow in your app.
Verify Access with PAT
-
Assign a Personal Access Token to your user account in Priority and verify that you can run Postman requests to Priority REST API using this token with Basic Authentication as follows:
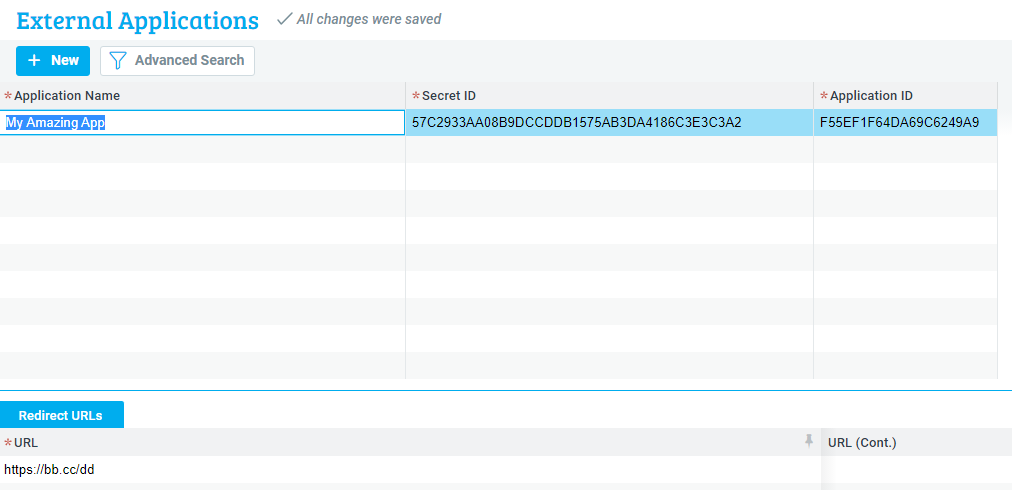
- Now that you’ve verified the connection works, open up the Priority UI and open the External Applications form (System Management > System Maintenance > Users > Manage IDs Externally > External Applications). Add a new Application - give it any name you want.
- Application ID and Secret ID are filled in automatically.
-
Add a Redirect URL in the relevant subform. For now, this URL can be anything. It does not need to be a real URL.
- Back in Postman, change the Authorization Type to OAuth 2.0
-
Under the “Configure New Token” tab, fill in the following fields:
a. Token Name: (Some name)
b. Grant Type:Authorization Code (With PKCE)
c. Callback URL: (The Redirect URL you entered in Priority)
d. Auth URL:https://(PRIORITY_DOMAIN)/accounts/connect/authorize
Note: PRIORITY_DOMAIN is whatever comes before the “odata” segment of the URL in the first screenshot above.
e. Access Token URL:https://(PRIORITY_DOMAIN)/accounts/connect/token
f. Client ID: (Your Application ID from Priority)
g. Client Secret: (Your Secret ID from Priority)
h. Code Challenge Method:SHA-256
i. Code Verifier: leave empty
j. Scope:openid rest_api
k. Client Authentication:Send as Basic Auth header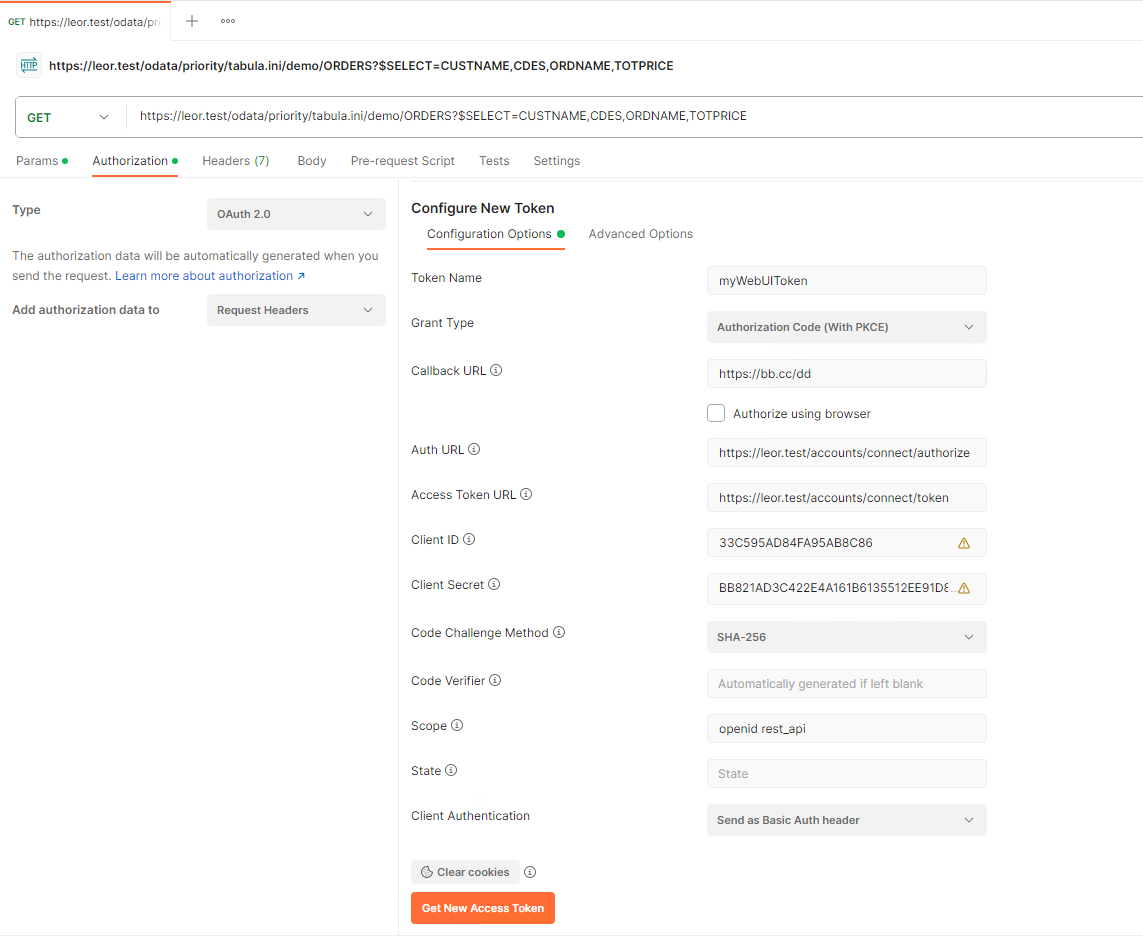
-
Confirm that the information is correct by pressing the Get New Access Token button. This will initiate the OAuth2 flow and you will be presented with the IdP’s authentication UI.
-
After you have authenticated, Postman will show the following dialog:
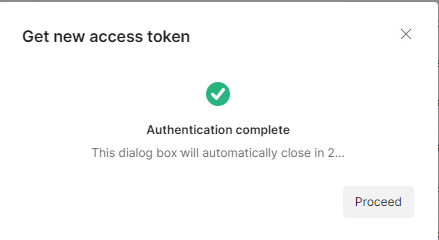
- Click Proceed and Use Token. Back in the main Postman UI, press the Send button to resend the request to the REST API, this time authenticating with the token.
- If you receive a response, you have successfully authenticated with the REST API using OAuth2.
Configure Your App
Now that you have successfully configured Postman to authenticate to the REST API using OAuth2, you will need to implement the same flow in your application.
- Make sure to update the Redirect URL to a real one that is implemented in your application.
- Only the Authorization code (with PKCE) flow is supported.
- We highly recommend you use a standard OAuth2 client library to run the flow and to implement the redirect URL endpoint. These libraries simplify the implementation of the authentication flow in your application, ensure that it follows the OAuth2 specification correctly, and reduce the risk of errors or security vulnerabilities
- If your library supports the use of the OpenID discovery endpoint, you won’t need to enter the Auth URL and the Access Token URL. The URL of the discovery endpoint is:
https://(PRIORITY_DOMAIN)/accounts/.well-known/openid-configuration - If you get stuck, compare the authorization request that your application is sending to the authorization request sent by Postman. You can see this request in the Postman console (ctrl + alt + c).